Leg rub exists. It’s a good reason to wear leggings under dresses; and, it’s what my trousers usually go out from.
Well, it happened again. Unlike the thing with the shirt, it’s not that the clothes I’m fixing are new this time; instead, it’s that, although I’ve kinda walked right through this pair of trousers, replacing them would also be kind of a bother so let’s kick that down the road a bit.
I grabbed a long scrap from the bin, pinned it into place inside the trousers behind the spot where some threads had given out, then threw it on my sewing machine and went back and forth and back and forth and etc. with a basic straight stitch. It’s not as pretty as the shirt either, but I’m not really expecting people to inspect my inner trouser thigh area (if they do, I might need to smack them with my bag, because personal space).
Let’s be honest, they’re still scuffed all to heck and I’m not going to get many more seasons’ wear out of them, but replacing them can still be a later problem.
We’ve all lost socks to the Clothes Dryer Creature one time or another, haven’t we? This creature is, of course, an excellent reason to line dry our clothes when we can. But, since not everyone’s situation is conducive to that — your weather might be too cold, or humid, or rainy, or you might need the clothes sooner than that — at least some of us will have to keep feeding socks to the Creature.
The sock isn’t worn out overall, and the hole showed up in roughly the arch area of the underside, so not even a high wear area like the toe or heel. All I can figure about this hole is that the sock escaped from the Creature.
Throwing the sock away seemed like a bad reward for it showing the resilience it takes to get away from the Clothes Dryer Creature, and unraveling it to reclaim the thin yarn it was made out of didn’t seem that much better. I thought about darning it, but the trouble with darning is it makes basically a patch of woven fabric in the middle of a knit garment (the overall sock), and knit fabric is much stretchier than woven fabric. (Yes, you can set up a knit stitch that won’t be, but they don’t use that for socks.) The thought of a tight patch in the middle of a sock gave me preemptive sensory squicks. So, instead, I decided to make a knitted patch right in there.
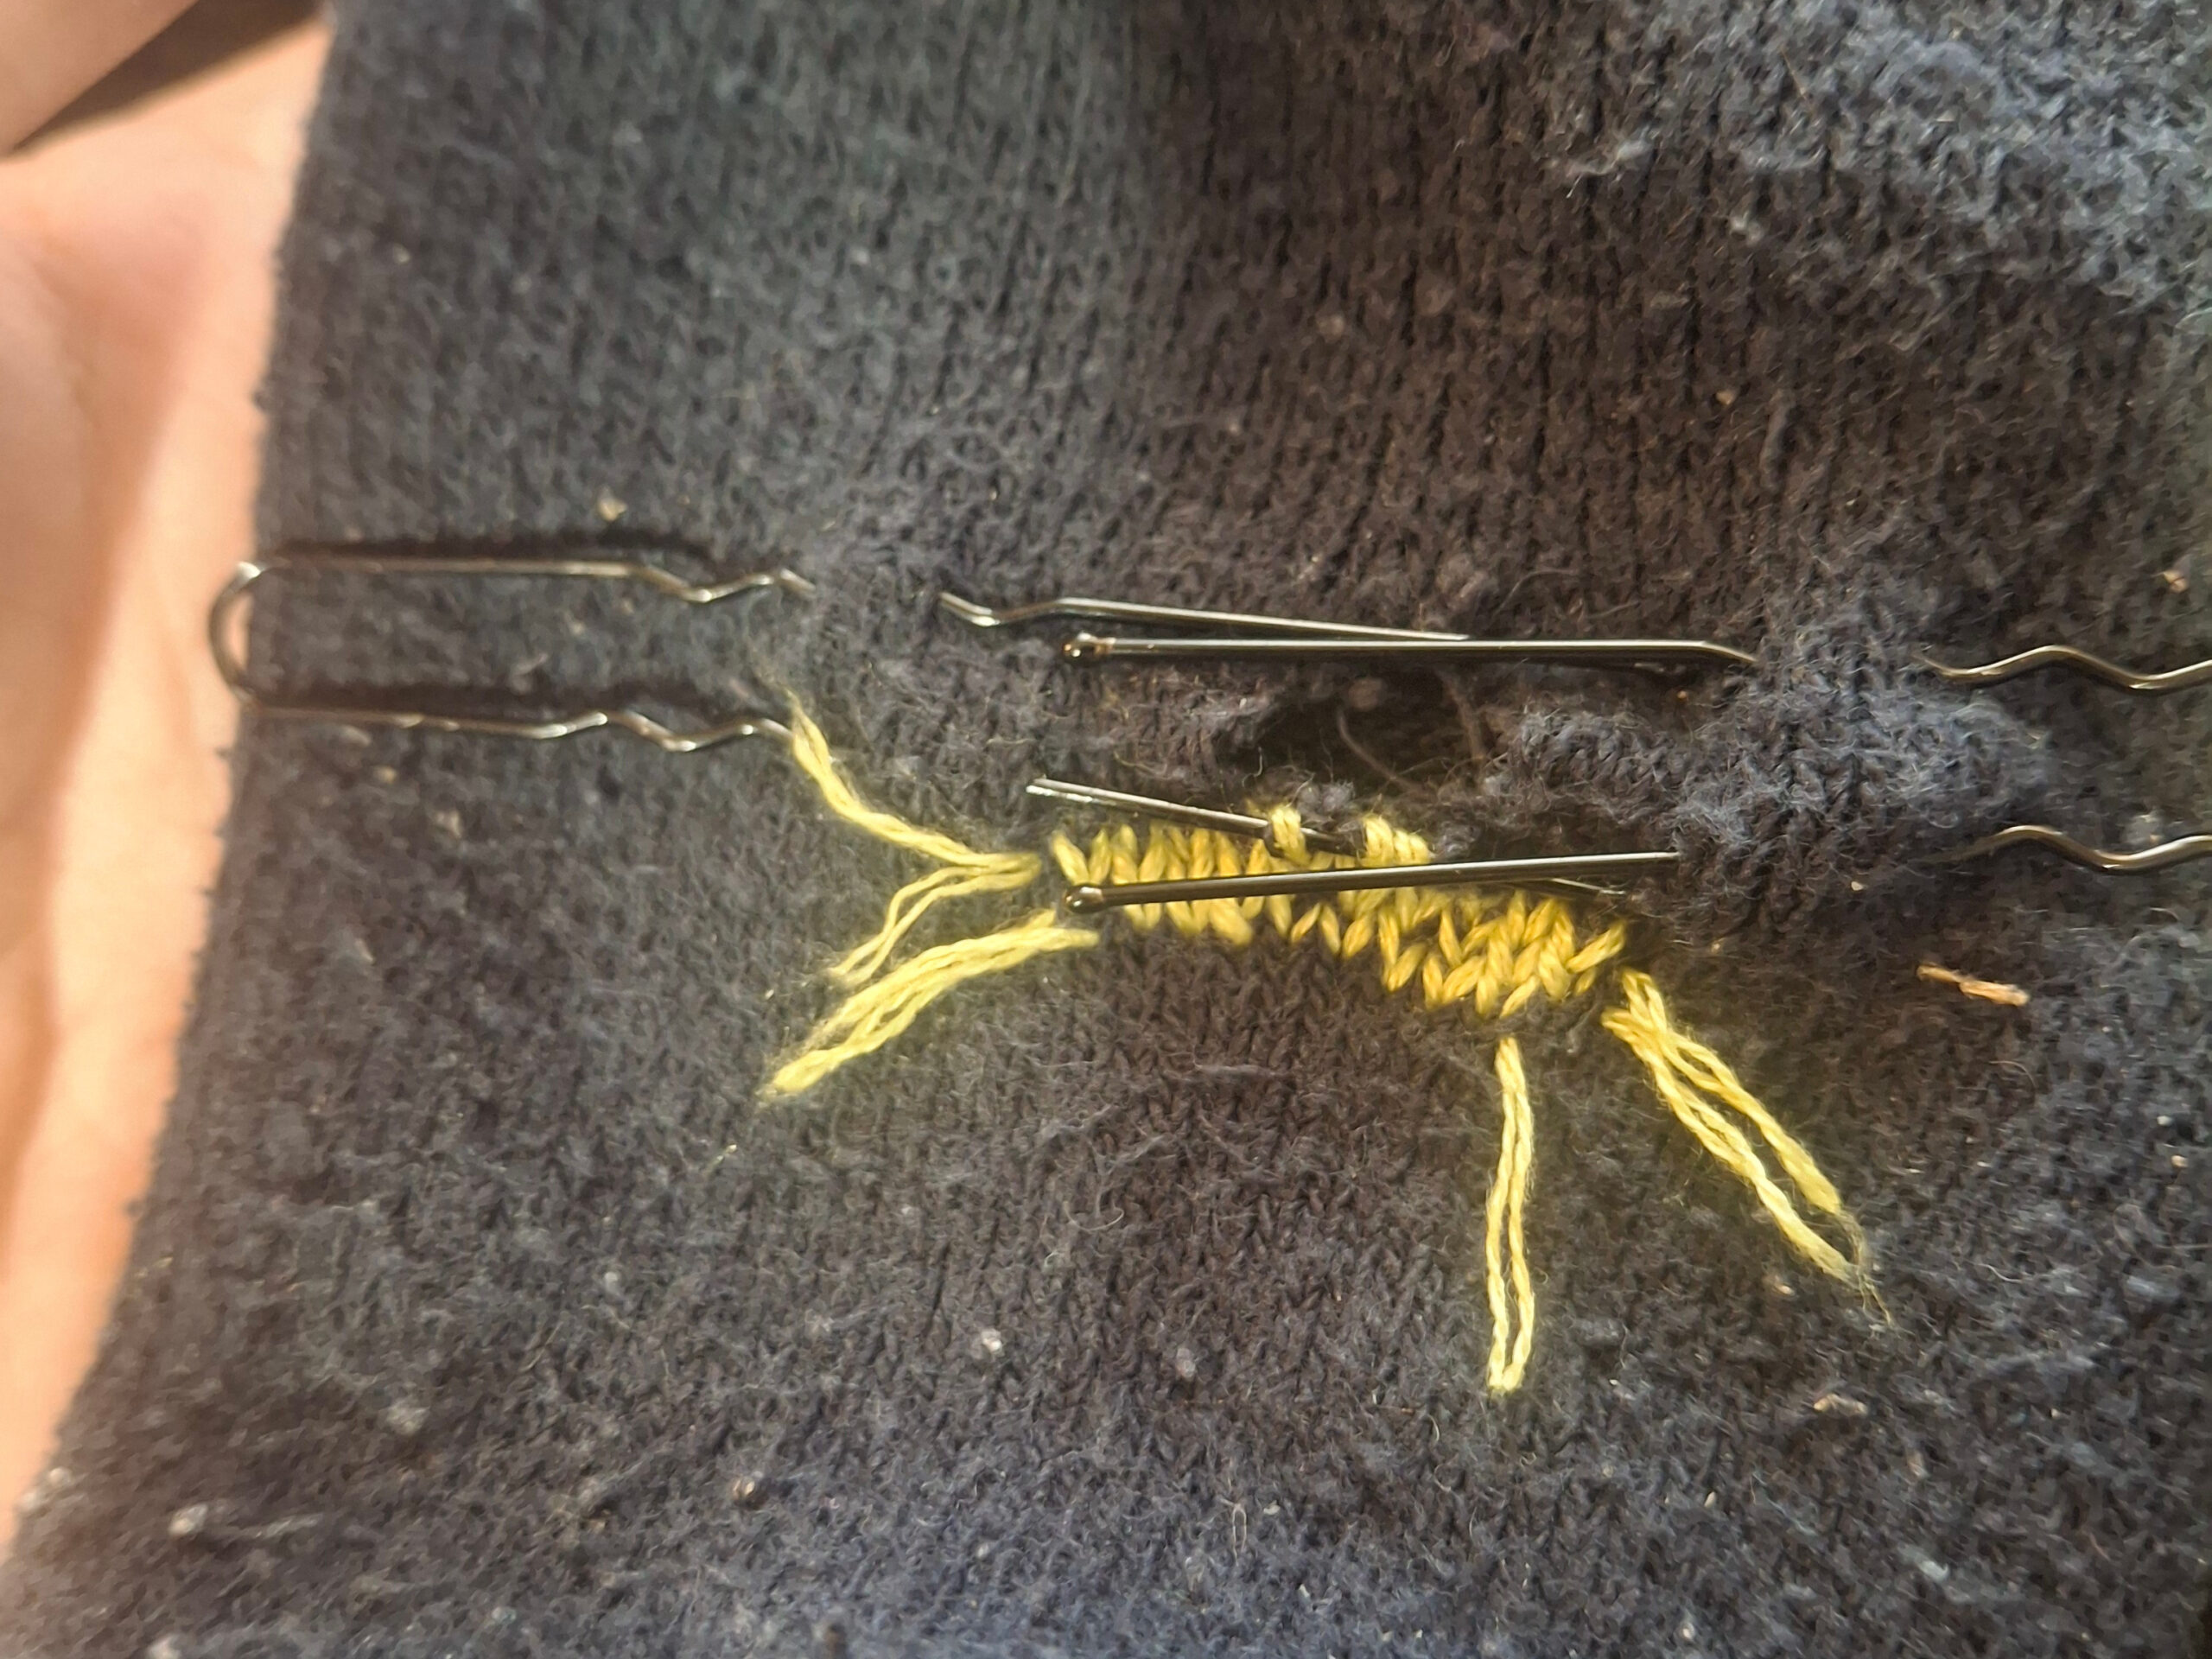
First, I needed yarn or thread to make the patch out of. Sock hand-knitting yarn is thinner than regular knitting yarn; I actually do have some in the stash, but the yarn used in commercial sock knitting is even thinner. Even six-strand embroidery floss seemed thicker; I ended up splitting the floss down to two strands. Also, since the hole is in a place that doesn’t show, I didn’t even bother trying to match the color, so this is definitely a visible repair. Instead, I picked out a color that I don’t usually wear or use, that I only had because it came in a value pack. However, you could match the color or make a decorative design; that’s what I would have done if this hole were in a place that would show.
After getting the embroidery floss ready, I started a couple rows below the hole, and followed the path of the yarn in the sock with my thread. Instead of using the needle’s pointy end, I pushed the eye through to keep from splitting the sock yarn.
Then, I repeated the process on the next row up.
After that, I noticed that the next row up would have a bit of trouble staying in place because some of the stitches in the next row after it had been eaten by the Clothes Dryer Creature. So, I slipped in a hairpin to do more or less the job of a knitting needle by holding the loops that would become stitches until the next row of stitches were put through them to hold them in place, before putting in the next row of stitches.
Since the floss was getting really short at that point, the last few stitches were put in by using a very thin crochet hook, rather than an embroidery needle.
After that, I placed another hairpin coming across from the opposite side, and passed the loops across from one hairpin to the other. (A very thin knitting needle would have been even better for this!)
Then, I worked my way across the row again. When I got to loops that were on a hairpin, so filling in the hole, instead of on the sides of the hole, I took that loop off of one hairpin and made a loop on the other hairpin, similar to what happens in hand knitting with needles ordinarily but just guiding the thread with a needle instead of with some spare fingers.
After that, I mainly just repeated the process for each row. In further along rows, I ditched the floss when it got short, instead of working it through with a crochet hook. I also had to cut another length of six strands, so arguably I should have cut the whole thing longer in the first place.
Eventually, I got to the top of the hole. At that point, instead of catching the new loops onto the other hairpin, I caught them on the first row above the hole, closing the hole.
Finally, I followed the path of the sock yarn for a couple more rows again, making an upper border around the hole, and tucked in the threads’ loose ends. Now the sock is ready to wear again!
Would I do this again? Sure — it’s maddening to lose a sock that’s otherwise perfectly good; and, after all, it didn’t deserve to be thrown into the scrap bin after it escaped the Clothes Dryer Creature with its life. This technique would be especially worthwhile as a way to save handmade socks, for two reasons: if you still have the last of the yarn from making the socks you would have the option to use it to complete an invisible (or nearly invisible) repair, and although this process was slower than earning the cost of a pair of commercial socks, it was much faster than knitting a whole sock.
A few weeks ago, I noticed my shirt had gotten a couple small holes, right next to each other, probably snags from going through the dryer. This was especially a bother because it was a fairly new shirt — I’d only worn it a few times — so throwing it straight into the scrap bin would have been wasteful.
Instead, I took something else out of the scrap bin. Can you find it?
In the scrap bin, I found a piece of fabric with similar colors and pattern (navy/white geometric) to one band of the shirt’s print, and used lime green thread (not in the picture) to rough out a teardrop shape through the shirt and scrap, around the holes. After that I rough cut the scrap to the teardrop shape, around the first basting stitches, and folded the edges under, then basted the folded edges down.
After basting, I dug through my embroidery floss stash until thread turned up that matched two of the other colors. I used the light blue one to make three touching rows of running stitch around the edge, and the salmon pink one to make two stripes across the patch in the middle. All the embroidery stitches went through both the patch and the main shirt fabric, so they both made the repair a good visual match and contributed to firmly attaching the patch to the shirt.
Here’s a close up of how it turned out:
It’s definitely one of those visible, rather than invisible, repairs, but I still think it looks like it’s supposed to be that way. I’m keeping the same patch material handy in case the same thing happens again, or maybe to put similar appliques elsewhere on the shirt as a repeating motif.